Rarely is a practical purchase, a cool purchase too.
This little ECU diagnostic gadget is hooked up to the ECU and displays a variety of different preset screens and can be configured in different colours (Green, Red, Blue..)
A short video of me fumbling around with the ECU diagnostic controls
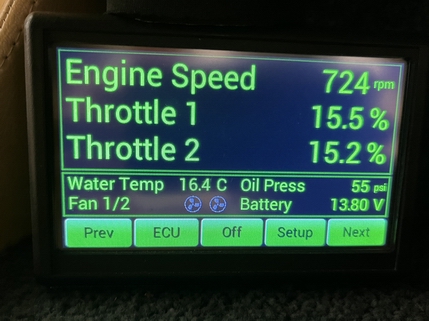
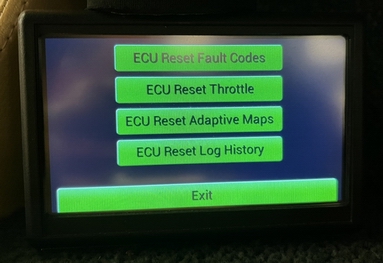
 By pressing the next button you can cycle between various status screens, and perform various resets should you need to.
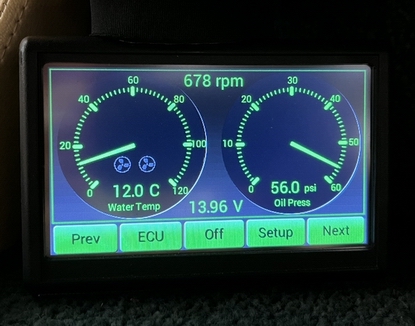
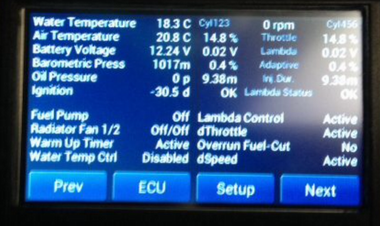
For day to day driving, I prefer the dials screen so I can easily glance at the Water & Oil pressure dials and whether 1 or both fans are running.
It’s also a lot more accurate than the analogue dials.

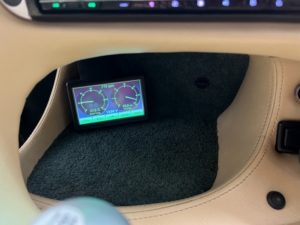
From a practical perspective, it sits nicely in the cubby hole, can be seen well even in strong sunlight, and is not intrusive.
Being able to watch the oil pressure slowly stabilise from start-up after a few minutes of driving, tells me when I can start to drive more energetically.
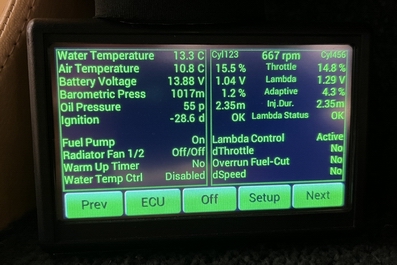
The fault code screen has also been handy in the past, e.g. when I’ve had a lambda sensor die on me.
What I find most useful is when driving in very hot weather.
In a heat-wave, the analogue gauge is difficult to read- how close is it to 100°C? because I know 100°C would be abnormal. The display might show it reach early 90s before you see the 2nd fan display light up and then the temperature start to drop.
Try and diagnose the same using the analogue gauge and you find yourself tilting your head at different angles trying to decide is it 90s or 100ish.
Wiring
The ECU diagnostic screen is connected to the ECU in the passenger footwell, by a 9-pin D-sub cable.
To connect the cable to the ECU, you need to remove the aluminium lid of the ECU housing.
Once removed, you can access the D-sub plug.
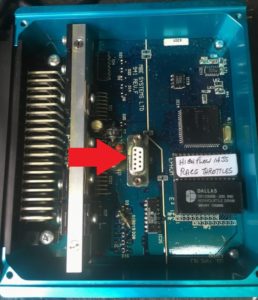 As I wanted this to be permanently fitted (and not wanting to cut up anything original), I cut a new square piece of aluminium to make a new lid so that the ECU housing would be complete again, but also cut a small rectangle in this new lid, so that the D-sub cable can be permanently connected with the lid attached.
So that the cable wasn’t coming out of the housing at an awkward angle, I used a right angle male/female connector.
With the ECU housing reinstated in the footwell, you wouldn’t know anyone has been here.
With the cable routed up from the footwell and into the cubbyhole, it connects invisibly to the display.
When first powering up, the unit has a nice TVR logo splash screen, before a second or so later showing the dials screen.
The unit is wired on ignition, so it is on when the car is running and off when not.
What I found was, when you press the start button once to wake the car up (and hear the fuel pump prime), the ignition-live stuff wakes up, so the radio comes on and this unit powers up. You then of course press the start button again to start the car. In doing so, the ignition-live stuff briefly goes off and comes back on again.
This would cause the ECU display to power-down and power-up again, flashing the TVR logo at you.
I found this a little annoying, so courtesy of Ebay, I wired a 12v delay timer in-line.
 Now what happens is, there is a 5 second delay before the ECU display wakes up, meaning it fires up once you’ve started the car. It’s the little things 😉
The ECU unit itself is hand made and software written by a great guy called Oliver [thanks again Oliver!]
Hi, This ECU diagnostics tool looks fantastic. Where did you get it from?
Thanks
Gareth
send a PM to EvoOlli on Pistonheads, he can help you out.